How to sync Vidyard's custom object in Salesforce with your Pardot prospects

Vidyard's integration with Salesforce CRM gives you insight into your leads, contacts and users' engagement with video, directly on their respective records in Salesforce. This is done through Vidyard's Video View custom object which you can add to the page layouts for each of these records.
With the addition of custom object syncing, you can also make Vidyard's data set available on your prospect records in Pardot.
You can then incorporate Vidyard's custom object data into your Pardot marketing automations, scoring and segmentation lists.
Note: while the Vidyard for Pardot integration is not required to sync the Video View custom object with between Salesforce and Pardot, it is an additional powerful tool to help identify viewers who watch your videos and create new prospects.
Requirements
- ✅ You must have purchased and set up the Vidyard for Salesforce integration
- ✅ You must have the Salesforce-Pardot connector (v2) set up in your account
- ✅ You must have a Pardot edition that includes Custom Objects (Advanced, Premium, or Plus with Custom Objects as an add-on).
Add the Video View custom object to Pardot
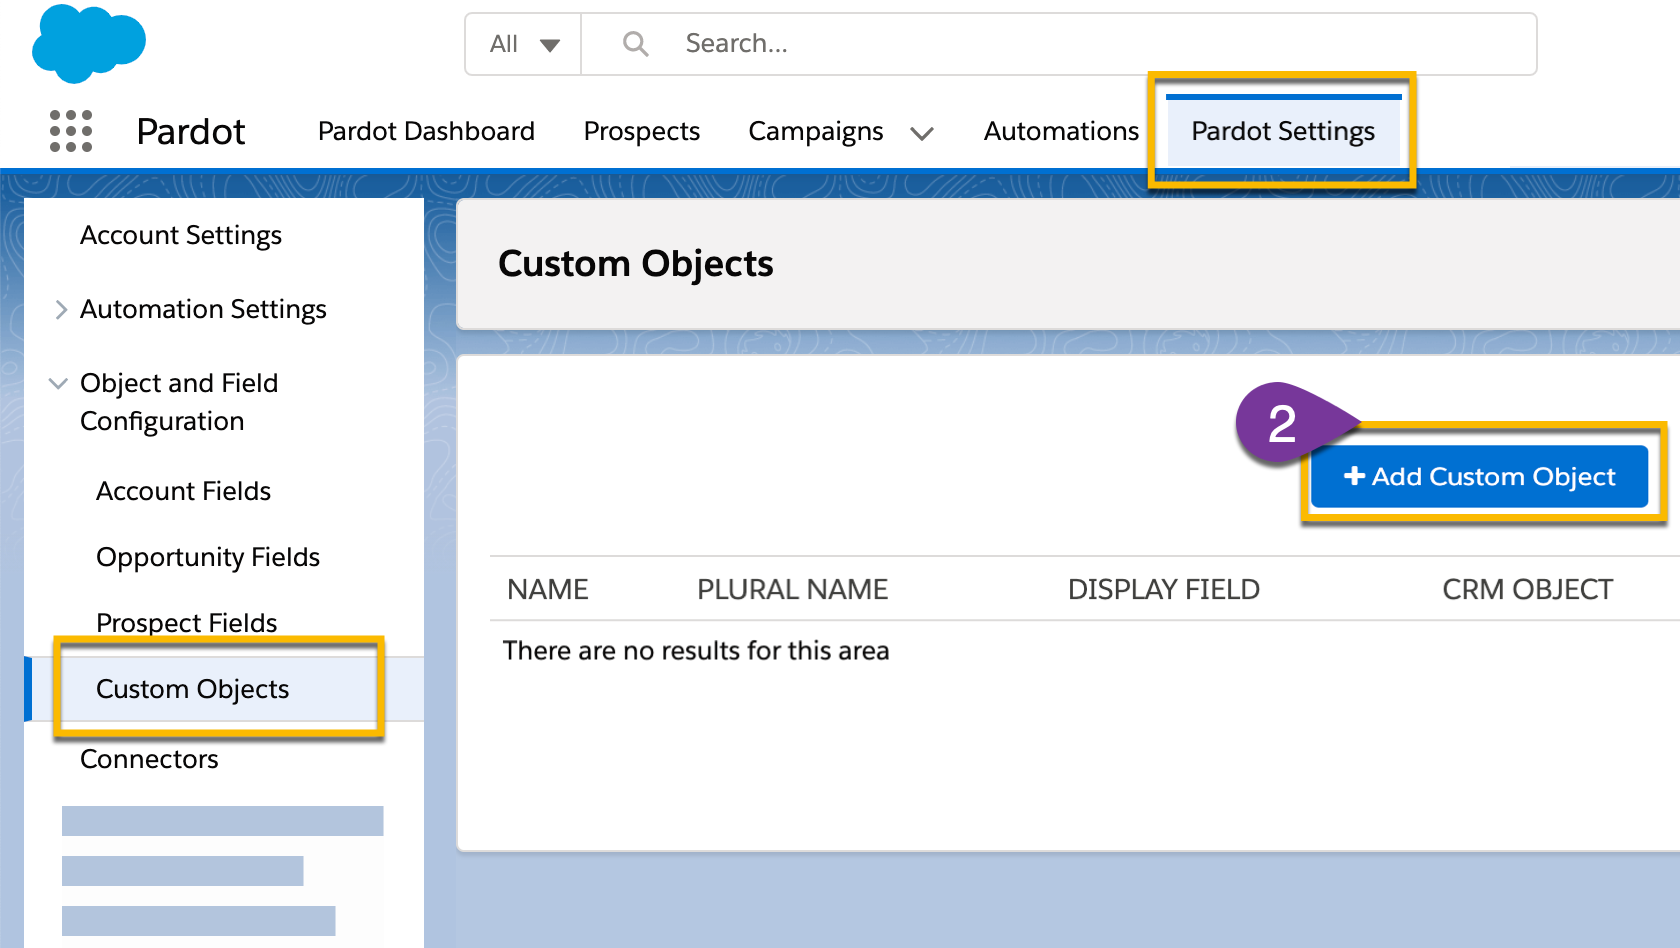
- Open the Pardot Lightning App in Salesforce
- Select Pardot Settings > Custom Objects > + Add Custom Object
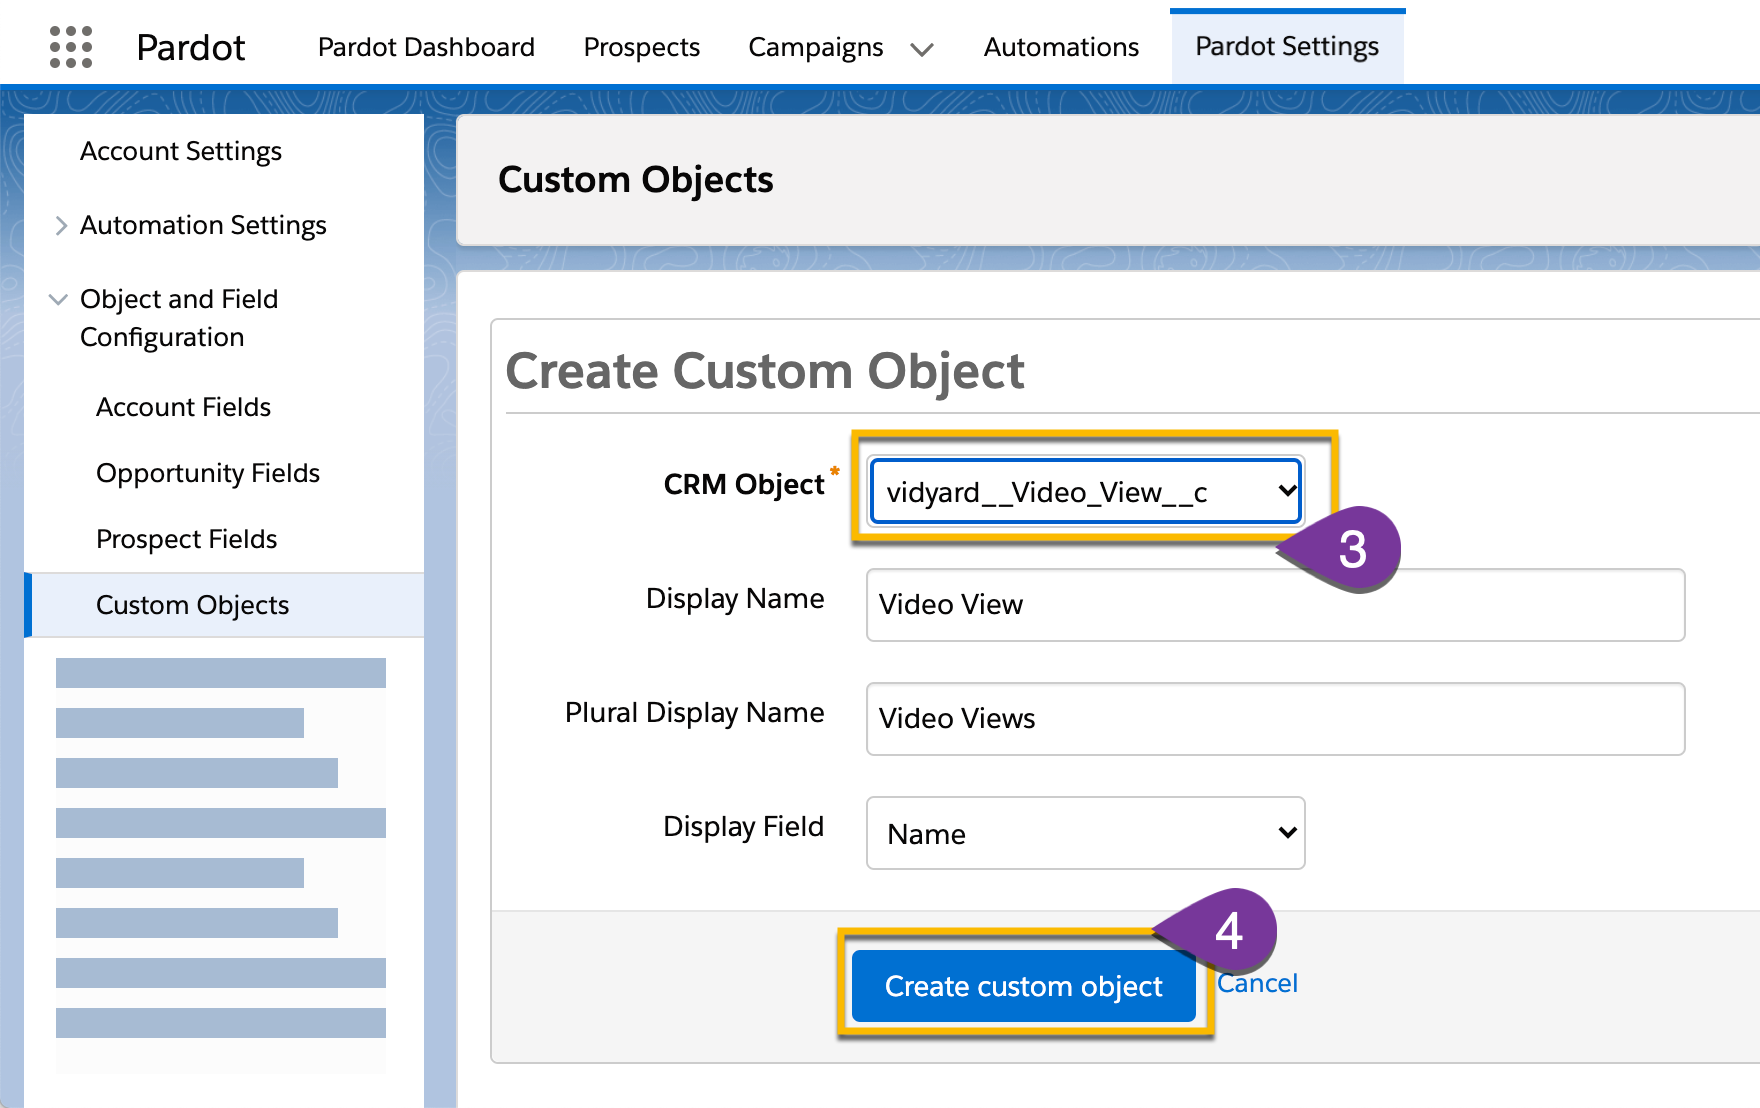
- Open the CRM Object dropdown menu and select vidyard__Video_View__c (this is the Vidyard custom object in Salesforce)
- Select Create custom object to finish
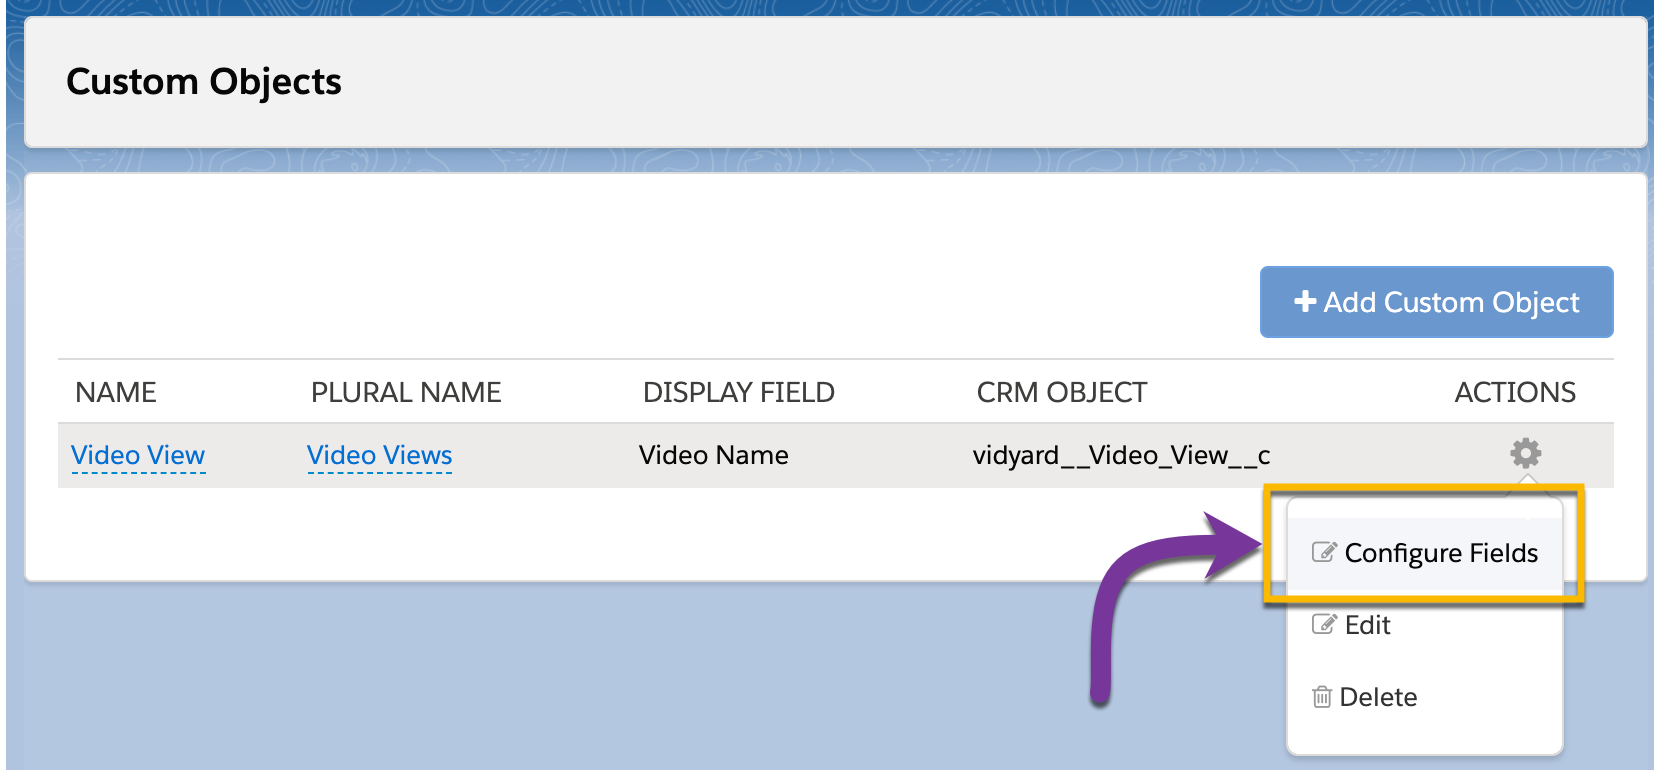
Configure the custom object's fields in Pardot
Once you've added the Video View custom object to Pardot, you can further configure what fields from the object you want to appear in the Related Objects tab on your prospect records.
You can always view data from the entire object. These settings let you determine what data you see at a glance.
- Click on Settings (the gear icon) next to the custom object, then select Configure Fields
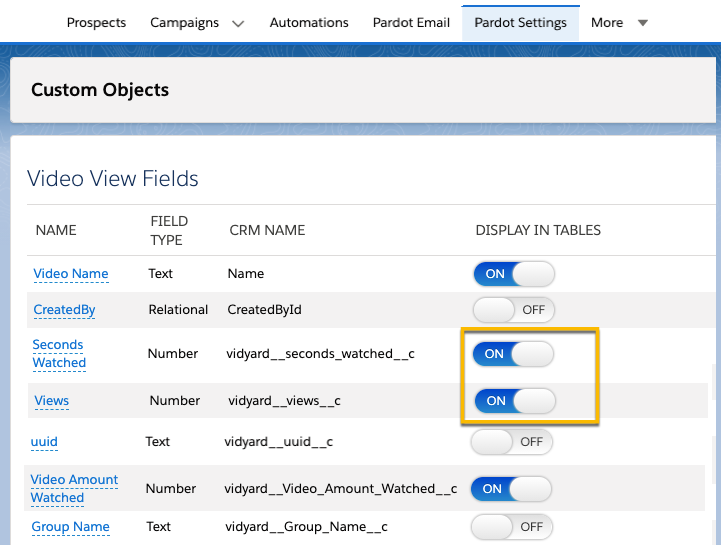
- Toggle the fields that you want to see at a glance in the Related Objects tab on your prospect records
Finding the Video View custom object on a prospect record
You can find the Video View custom object in the Related Objects tab on a prospect record.
If the prospect has a corresponding lead or contact in Salesforce with video views from Vidyard, you'll see the data from the custom object appear here.
The custom object appears as 2 tables, one for a corresponding Contact record (vidyard__Contact__r), another for a corresponding Lead record (vidyard__Lead__r)
- Open a prospect record
- Select the Related Objects tab
- Click on any video name to see the full set of custom object data for that video view
Note: it may take some time for the custom object in Pardot to sync with Salesforce (~every 10 minutes). You can always select the Sync with CRM option on a prospect record to force an update.

Manage syncing between Salesforce and Pardot
Salesforce and Pardot sync a number of different records, fields and objects, including the data from Vidyard's custom object. It's useful to understand how you can use the Salesforce-Pardot connector to manage syncing between the two platforms.
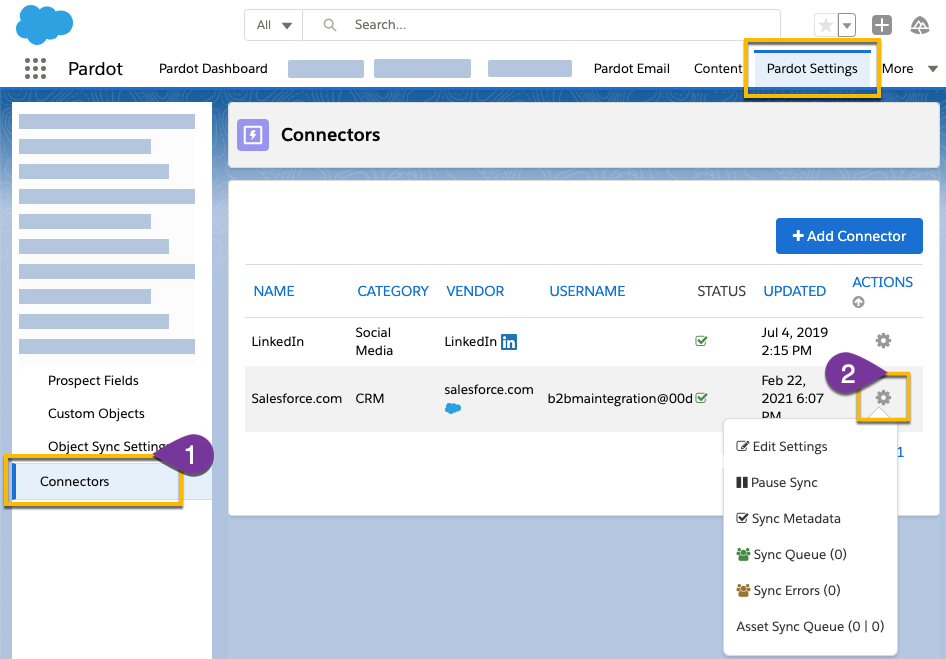
Open the settings for the connector to access syncing options. Here you can force a new metadata sync, review errors and manage items in the sync queue.
- From the Pardot Lightning App in Salesforce, select Pardot Settings > Connectors
- Select Settings (the gear icon) next to the Salesforce.com connector
What data is included in Vidyard's custom object?
Here's a list of the complete data set included in Vidyard's custom object.
When you set up Vidyard's Salesforce CRM integration, data is written to lead, contact and user records where the custom object has been added to the page layout as a related list.
| Data type | Description |
| Views | The number of times a viewer watched the video |
| Seconds Watched | The total number of seconds a viewer watched a video (includes seconds re-watched within the same browser session) |
| Video Amount Watched | The amount of the video that the viewer watched (expressed as a percentage) |
|
Date |
The date the video was watched |
|
Name |
The name of the video |
|
Video UUID |
The unique internal ID associated with the video |
|
Video ID |
The unique external ID associated with the video |
|
Group Name |
The name of the folder in Vidyard where the video is located |
|
Player Name |
The name of the video player |
|
Player UUID |
The unique ID associated with the player |
|
View ID |
The ID associated with the data set that is generated each time the player loads |
|
Embed URL |
The web URL where the view occurred |
|
Custom Attributes |
Any custom metadata that has been associated with the video (learn more about custom attributes) |